Kit Assembly
Because of logistics and regulations, µGame currently only comes as a kit without the battery included, and with the display screen not attached. It requires some assembly.
Battery
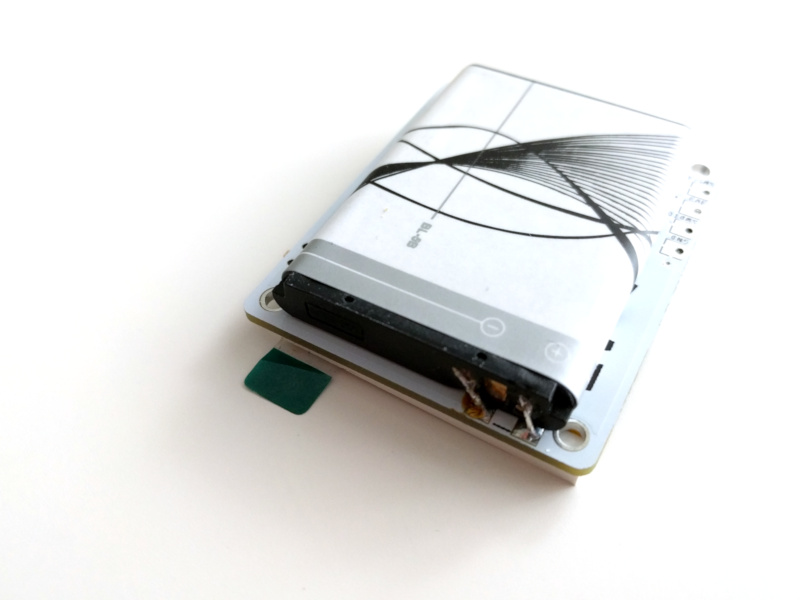
You can use any phone battery of at least 400mAh capacity. I have found that the Nokia BL-5B fits on the back of the device nicely, and that you can stick it there with a two-sided tape. Then you will have to solder the battery leads.
Make sure to get the polarity (plus and minus) right, because there is no reverse polarity protection, and you will fry the device and possibly damage the battery in the process if you connect it in reverse.
Also make sure to move the display screen away from the soldering points, so that you don’t melt its plastic while working. Solder two short wires to the pads on the back of the device, and to the battery terminals. Refer to this photo.
Note that different batteries have their terminals arranged differently, and that there is usually a third terminal with just a resistor connected to it, for battery identification — you don’t need to connect that third terminal to anything. It’s best to use a multimeter to make sure you got the connections right.
Screen
Once you have the battery soldered, you can attach the screen in place. There are two thin brown strips on the back of the display — they are the two-sided tape. Just remove the brown paper from them, and stick them in place.
In practical testing we saw that those strips are rather weak until you let them settle for a while. You might want to add your own two-sided tape there to get a stronger binding. Be sure to stick the screen straight – once the glue settles, it’s very hard to unstick it without damaging the display.
